|
Here is a budget friendly bathroom remodel. First, we started with a dingy, mildewy, stained fiberglass bathtub. 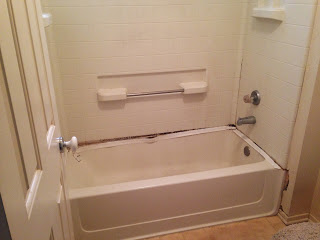 The caulk was stained from mildew, and the sheetrock in front of the tub was rotten from years of water damage. So we tore it out to the studs (framing). Then, we furred out the walls with strips of wood we ripped on the table saw in order to plumb and straighten the wall. We did this because we used hardibacker instead of the traditional mortar float. With a mortar float, the mortar evens out any waves in the wall and levels it out. After we shimmed the wall, we set the tub and hooked up the waste and overflow. Then we installed the new valve assembly. Once that was done, then we installed the vapor barrier, which in this case we used a standard tar paper over lapped. Once the moisture barrier was put up, we installed the hardibacker per manufacturers specs and taped the seams with the proper mesh tape and mortared the seams. 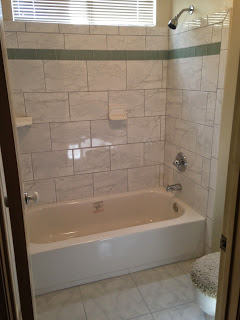 After all that, we installed the tile and grouted per standard building practices. We finally sealed the grout, painted the bathroom and re installed the trim. What was left was a beautiful, budget friendly bathroom, which cost the owners only $3000 labor and material for a tile bath tub and floor.
1 Comment
What is a kitchen resurface you might ask. Well, it's just that: resurfacing your kitchen. A complete kitchen remodel can be quite intrusive, expensive, dusty, dirty and time consuming; but a kitchen resurface can be quick, inexpensive and totally transform your kitchen without changing the layout. What's involved in a kitchen resurface is usually replacing all the doors and drawer fronts, sanding the frames of the cabinet down to bare wood and laminating new wood on the body of the cabinets. Then staining or painting the cabinets a new color. We can add trim, new soft close hardware (drawer slides and hinges) new dovetail, solid wood drawer boxes, or anything else to revamp your kitchen without totally removing the old cabinets. 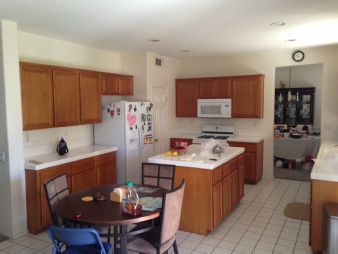 Here is a kitchen we at Matthews Custom Construction are particularly proud of. It started out as a usual, run of the mill oak kitchen with tile counter tops. 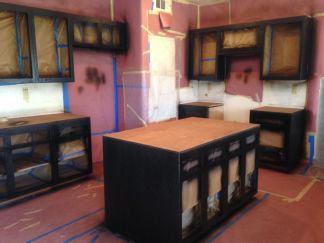 Then we took off all the doors, counter top, taped off the kitchen, sanded the face frames, laminated on new veneer on the sides, and stained and urethaned the cabinets. 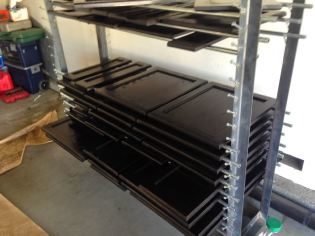 Here are the new doors drying on the rack. 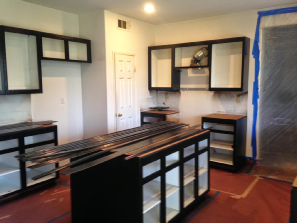 Once we got the trim done, we put it inside to get ready for installation onto the cabinets. 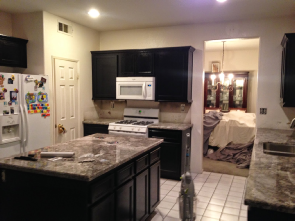 Once we took the paper and plastic off the walls, we started installing all the doors, drawer fronts and hardware. 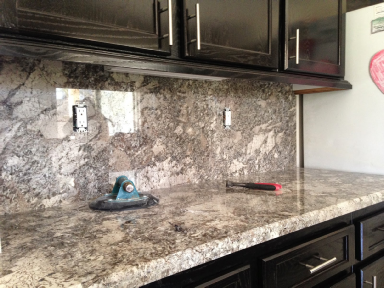 Here's a closer look at the new granite counter tops. 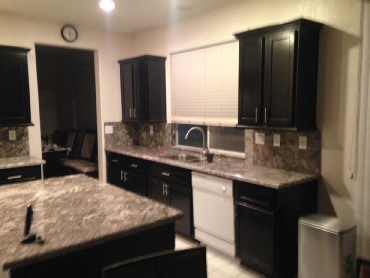 And a final look at the "new" kitchen. What a transformation, huh? It's a brand "new" kitchen. Same layout, same number of drawers, just a whole new look. If you are in the Riverside, Corona, Loma Linda or anywhere in the Inland Empire, go to our website to find out how we can transform your new kitchen.
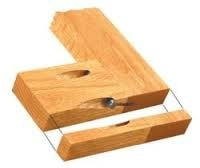 Cabinet joinery can take on many forms. When considering the frame many options exist, some more rigid than others, some faster and some more elegant. All depending on who is making it, whether or not cost is the greatest factor, ease of production, etc will all sort of dictate what is used. The cheapest, fastest, and easiest would be a pocket screw. Cabinets and furniture assembled together as such would tend to be cheaper and quicker. So if cost is the deciding factor, than this is probably what you'll get. It will hold together well enough, but even with glue, end grain doesn't really hold well when glued, so the glue won't be doing much to keep the joint together. All the structure of the joint is in the screw. The next would be dowels. Holes are drilled on either side of the joint to allow dowels to be glued together. In this case, you're relying on the dowels to "bridge" the joint and hold the two sides together with glue. Glue joints tend to be stronger the the wood it's holding together. If you were to glue two pieces of wood together and pull them apart until they failed, chances are that the wood would split before the glue joint failed, meaning that the glue is inherently stronger than the wood itself. However, in this case, though somewhat preferable to the pocket screw, the dowel is the weak link in the chain. But it is the quickest of the glue joint method. Mortise and tenon is by far the strongest and more durable of the connections. It starts by cutting a tenon in one of the boards. This is stronger than the dowel method in that you're relying on the board itself to tie into the other. You cut a corresponding "hole", or mortise in the other board to slide the tenon into. For millennia artisans have used the mortise and tenon joint from furniture making to barn building to create solid connections. Before the advent of modern wood glue tenons would be fastened to mortises by way of a dowel drilled through the mortised board and tenon. With the use of glue in place of the dowel, the joints become as permanent as a single board. Here is a desk built by Matthews Custom Construction using only mortise and tenon joints. No metal fasteners were used in it's construction. If you would like to see how to cut tenons on a table saw, watch our video. The link is provided. youtu.be/42ErjJYE_L0 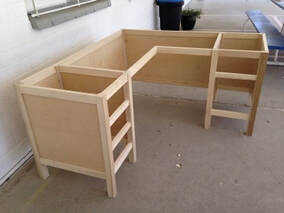 |
 RSS Feed